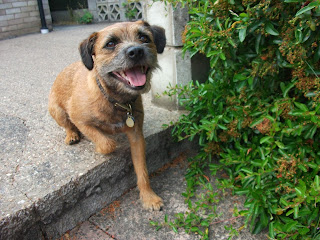
Earl loves homemade treats! And the healthy honey biscuits seemed to really fit his bill! So I splashed out on some more ingredients, preheated the oven and got baking!
Here's how you do it...
Ingredients you will need:
5 oz (150 g) whole wheat flour
5 oz (150 g) porridge oats
2 teaspoons baking powder
1 oz (30 g) butter
2 tablespoons honey
2 eggs
3 fl oz (100 ml) milk
Flour for dusting (you already have this if you have the above!)
1. First, mix the flour, oats and baking powder together thoroughly....
 |
| Adding the flour... |
 |
| ...And oats... |
 |
| ...Now baking powder... |
 |
| ...And mixing them well together. |
2. Next, add the butter in small flakes, plus the honey, eggs and milk...
 |
| Breaking the butter into small flakes then adding... |
 |
| ...Drizzling the honey into the mixture... |
 |
| ...And now the milk, and the eggs. (Sorry, you can only see one egg in this photo, you need TWO to do the full recipe!) |
3. Now, knead the mixture together thoroughly...
3. Then preheat the oven to 400degreesF (200degreesC, sorry my keyboard has no degrees sign), and cover a baking sheet with baking parchment so you are ready for baking your biscuits...
4. Now roll the dough out about 1/2 an inch (1 cm) thick on a floured surface...
 |
| Ta-da! |
5. And for the fun part, cut out your choice of shape using your choice of cookie cutter!...
 |
| We used dog bone shaped cutters! |
6. And then place these of a baking sheet, leaving some space between each one to prevent them linking together as they expand in the oven...
 |
| Ready for the oven... |
 |
| ...About to make their grand entrance... |
7. Then bake in the hot oven for 15-20 minutes...
...Tick tock....
...Tock...
Tick...
Earl's Tip!: Woof! If your baking sheet overflows, make sure you use another one so your mixture doesn't go to waste! We used just a simple buttered china plate for our second batch. Just put there on the bottom shelf in the oven to your first batch!
Tick Tock....
Tock.... Tick... Tock... Tick... To-
DING!
8. Right, now you can take them out of the oven and leave them to cool. The recipe says to turn the heat off the oven and leave the biscuits in there for a following 2 hours to cool and dry (in other words, if you did this, they would just be more crunchy and hard), however we just left them out of the oven until we thought they were ready. No need for such a heavy amount of time unless you want crunchier biscuits.
 |
| Them cooling and drying out of the oven for a few minuets... |
9. Decorate them and do what you wish! We wrapped one in ribbon, for Earl to give to one of his best doggie friends :)
 |
| ...A beautiful result and such a fun time had! |
10. FINALLY! Serve these up, break them up to use as treats or training treats, and let your dog(s) enjoy. Earl is just all over them!
Earl says: WOOF! Get your humans to make these NOW - They are sooo scrummy!
 |
| Waiting for his healthy homemade biscuit in a anticipation! |
 |
| Crunch! |
 |
| NOM UP. |
 |
| Mine... I still want the crumbs, says Earl! |
Oh, and we shan't forget step 11... have fun with your leftover mixture if you have any! I made a mixture-dog out of mine, but unfortunately, he burnt as I forgot about him in the oven :(
 |
| Before the oven! |
So have a go at these wonderful biscuits and see how your dogs love 'em!
Earl's review on these, are how fantastic they taste!
I say they are healthy, and fairly easy to make. However if your dog is allergic to grain or you prefer grain-free treats and food, these may not be your sort of thing.
Enjoy!
Earl and I.


